Use the Explorer Widget to browse, search, and organize EQuIS database objects within folders. Users can create folders to group objects, create new files and facilities, and edit or delete files from the database.
For information on uploading, editing, or searching files within the widget, see File Management.
Widget Interface
The Explorer widget is divided into sections, as depicted in the image below:
•Tree of all file folders and contents (left pane)
•Information grid (main pane)
•Frame above the grid that displays an interactive folder path and contains the Advanced File Search, New File, and New Facility options
•Paging control beneath the grid

On the left is the Folder Tree section of the widget, where the existing folder structures are displayed. Resize the Folder Tree pane by dragging the || icon sideways.
Click a folder name to see the contents of that folder in the information grid. The interactive folder path above the grid will also update. When you click a folder name, any sub-folders will also be displayed. Objects can be dragged and dropped between folders.
To create a new folder, right-click on a folder in the left panel and select New Folder from the context menu. Administrators can move objects into the new folder. Users can access the folders in other widgets where the folder icon is visible (such as the EZView widget) for selecting/grouping reports.
Note: If folders in a group are not visible, check that the STATUS_FLAG field in the reference table RT_GROUP is set to 'A' for that group. |
|---|
The Explorer widget information grid lists all objects in the selected folder and their attributes (name, code, remark, type, and owner). The icons indicate the object type. The following table details the attributes displayed in the grid by object type, except for the Remark field, which is optional.
Icon |
Name |
Code |
Type |
Owner |
|---|---|---|---|---|
|
Dashboard Title |
Dashboard Title |
DASHBOARD_ID |
Creator of Dashboard |
|
Facility Name |
Facility Code |
FACILITY_ID |
Facility Project Manager |
|
File Title Hover over this field to see the FILE_ID at the end of the URL. |
File Name |
FILE_ID |
File Author |
|
For user reports, this is the Report Name.
For base (system) reports, this is the Report Display Name. |
For user reports, this is the base report specific name of the report.
For base (build) reports, this is the specific name of the report. |
USER_REPORT_ID
REPORT_ID |
If created in Enterprise, the creator of the user report. Otherwise left blank. |
|
Widget Type Name |
Widget Type Name |
WIDGET_TYPE_ID |
N/A |
The grid columns of the Explorer widget can be sorted or filtered based on these object attributes.
Sorting – Clicking on a column header to sort a column (click again to reverse the sort). Sorting does not change the current page, and the first or last values of the sorted column may not be displayed, unless on the first or last page of the list.
Filtering – To filter an attribute, enter a search term (three or more characters) in the search box beneath that column header. There is a three (3) character minimum on search strings by design; searching one or two characters will not return results. Only attributes that contain the search term will be displayed.
Tip: Files loaded to EQuIS via a format file or in Professional may not have a "Title" value, which is what is displayed in the Name column in the grid. Thus, filtering and/or sorting on the Code column, which contains the file name, may yield better results for file objects. |
The widget contains a Layout Divider indicated by the two parallel bars || that can be dragged to resize the tree and grid portions of the widget. Each of the columns in the information grid can also be resized by dragging along the column dividers.
The bottom of the widget contains paging controls for displaying a limited number of items at a time, as described below.
Arrows – Use the left/right arrows to navigate through pages.
Go to Page List – Select a specific page to navigate directly to that page.
Rows per Page – Change the number of items to be displayed per page by using the drop-down menu.
Count of Pages and Total Items – This control indicates the total number of items available in the widget, how many pages to display the items, and which page is currently selected.
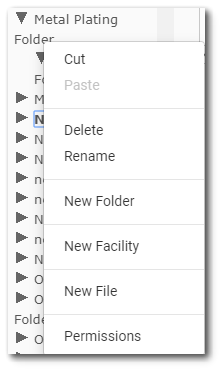
Context Menu
Right-clicking a node in the folder tree displays a context menu, as shown below. This includes the following options:
Cut – copies a folder from the tree and, once pasted, removes the folder from the original location. Available to Administrator users. Paste – Inserts a Cut folder or a grid object into the right-clicked folder. Delete – After clicking Yes on the confirmation window, deletes the right-clicked folder. Rename – Gives the ability to rename the folder's display text in a pop-up window. New Folder – Allows the user to create a new folder within the currently selected folder. Right-click on the root folder to create a top-level folder. Available to Administrator users and Non-Admin users with owner permission on the selected folder and creator permission on the groups and folders object type. New Facility – Opens the New Facility window. This is the same as clicking on the New Facility button in the widget header, except that the new facility will be inserted into the right-clicked folder. New File – Opens the New File window. This is the same as clicking on the New File button in the widget header, except that the new file will be inserted into the right-clicked folder. Permissions – Opens a permissions window to set the right-clicked folder's permissions. The administrator will be able to grant or deny different permissions to users or roles. |
|
Right-clicking in any column for an object listed in the information grid also shows a context menu. If the user has appropriate permissions, this context menu will include Cut, Paste, Delete, and/or Permissions.
Cut and Paste – Cut will remove the object after it is pasted. Paste will insert the object into the currently selected folder in the Explorer tree.
Delete – If the grid object is a user report, dashboard or file and the user has owner permission on the report, dashboard or file, this option will be available. For a user report, clicking this option will remove the report from Enterprise, although it will remain in the database (with the STATUS_FLAG set to R). If the report is associated with an EIA, the delete action will fail, and a message will be displayed. If a file is deleted via the Explorer Widget, the file will be removed from the database tables. After clicking Yes on the confirmation window, this will delete the file from EQuIS.
Permissions – This option is available for administrators. This opens up the permissions dialog, allowing an administrator the ability to grant/deny permission on the selected object to a user or a role.
Drag and Drop
Administrators, as well as non-admin users with sufficient permission, can drag and drop one or more objects from one folder into another. To select multiple items, hold down Shift or Ctrl when clicking items.
Non-admin users need Owner permission on the following:
•object(s) being moved
•source group from which the object(s) are being moved
•target group to which the object(s) are being placed
An alert informs the user where they do not have sufficient permissions (e.g. "Insufficient permission on the items being inserted"). In this situation, the changes will not run.
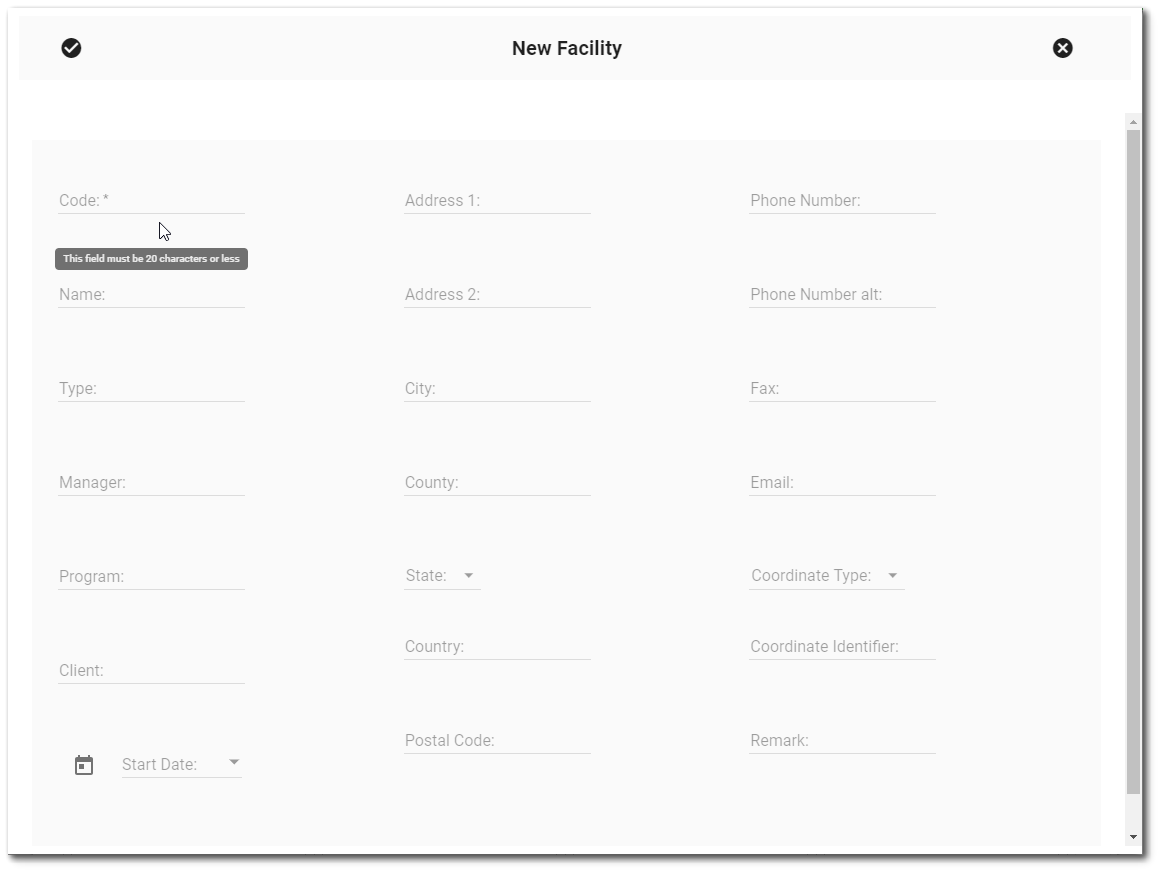
New Facility
To launch the New Facility window, click the New Facility button or context menu option. The only required field is Facility Code. Hover over the field to see the maximum number of characters allowed.
To change properties of the Explorer widget, open the Widget Editor by selecting More Options ![]() > Edit in the Widget Header.
> Edit in the Widget Header.
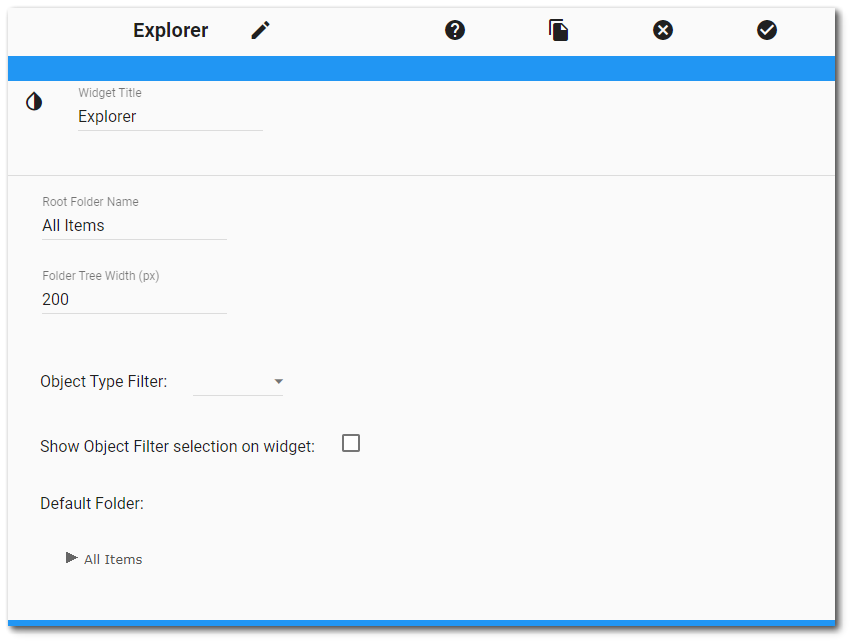
Widget Title – By default, the widget title is Explorer. The title can be modified.
Widget Theme![]() (next to the Widget Title) – Change the widget color.
(next to the Widget Title) – Change the widget color.
Root Folder Name – This property is only available to administrators. The Explorer Widget tree has a default root folder whose name defaults to All Items. This can be changed on a widget-by-widget basis, either here or by using the context menu Rename when right-clicking on the root folder in the tree.
Folder Tree Width (px) – Set the width, in pixels, of the tree view that will persist upon refreshes or navigation.
Object Type Filter – Select one or more of the object types in this list box to only list objects of the selected type(s). When no type is selected in this property, all object types will be displayed.
Show Object Filter selection on widget – Check this property to list the selected types in the Explorer widget header. With no object types selected when this property is checked, the related message displays All.
Default Folder – Selecting a default folder will cause the Explorer widget to show items from that folder, hide the search box and the folder tree. Once enabled, the default folder can only be changed to a different folder. The feature cannot be unset, other than by deleting the widget and adding a new Explorer widget to the dashboard.
Object Editor ![]() – Set various appearance properties of the widget via the Widget Object Editor.
– Set various appearance properties of the widget via the Widget Object Editor.
Help ![]() – Launch online documentation for the widget.
– Launch online documentation for the widget.
Copy Settings ![]() – Copy widget settings from another widget of the same type.
– Copy widget settings from another widget of the same type.
Close without Saving ![]() – Exit the Widget Editor without saving changes.
– Exit the Widget Editor without saving changes.
Save ![]() – Apply Changes and close the Widget Editor.
– Apply Changes and close the Widget Editor.