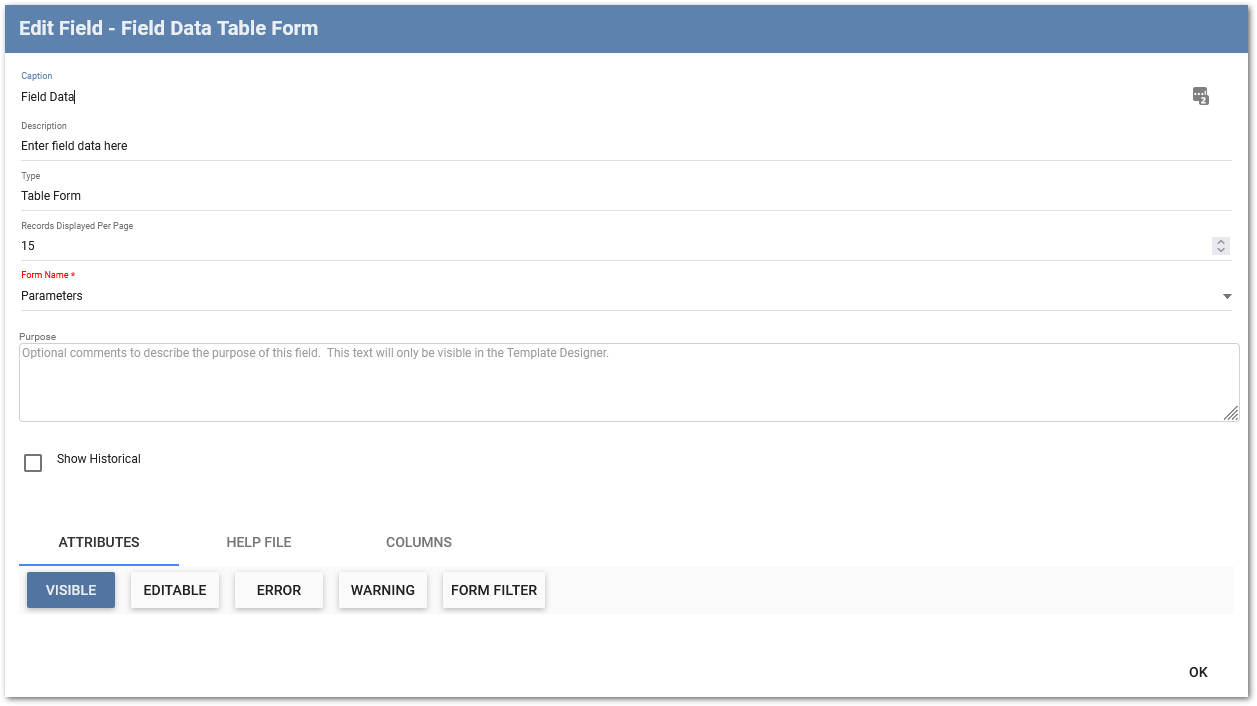
The "Table Form" field type allows users to enter data directly into a tabular grid in Collect Mobile. Available fields on the template can be added as columns in the table form field (e.g., parameters such as time, pH, turbidity). Users capturing data can add new rows (i.e., records) to the table form field grid. An overview of the Collect Mobile user interface and functionality for entering data into a Table Form field type is available here.
Note: The attributes applied to a field are carried through to the column in the Table Form. For example, if the field as the Visible attribute that evaluates to FALSE, it will not appear on the Table Form field. However, there are two differences to make note of:
•When triggered, the Warning attribute is displayed as a yellow triangle with an exclamation mark icon •When triggered, both the Error and Required attributes are displayed as a red octagon with an exclamation mark icon |
|---|
After adding a Table Form field to a template in the Template Designer, several properties are available to be configured. The following properties are specific to the Table Form field type.

Records Displayed Per Page – Defines the number of records in the Table Form field in Collect Mobile. The default number of records displayed per page is 10, with a minimum value of 1 and a maximum value of 50.
Form Name – The Form Name is a required property and the drop-down list will display options including either parent form sections or associated child form sections, which correspond to the relevant parent form. Table Form field types are able to maintain parent/child form relationships.
Note: If adding the Table Form field to a child form section, the available form names will only include parent form section related to the child form section. |
|---|
Columns Tab
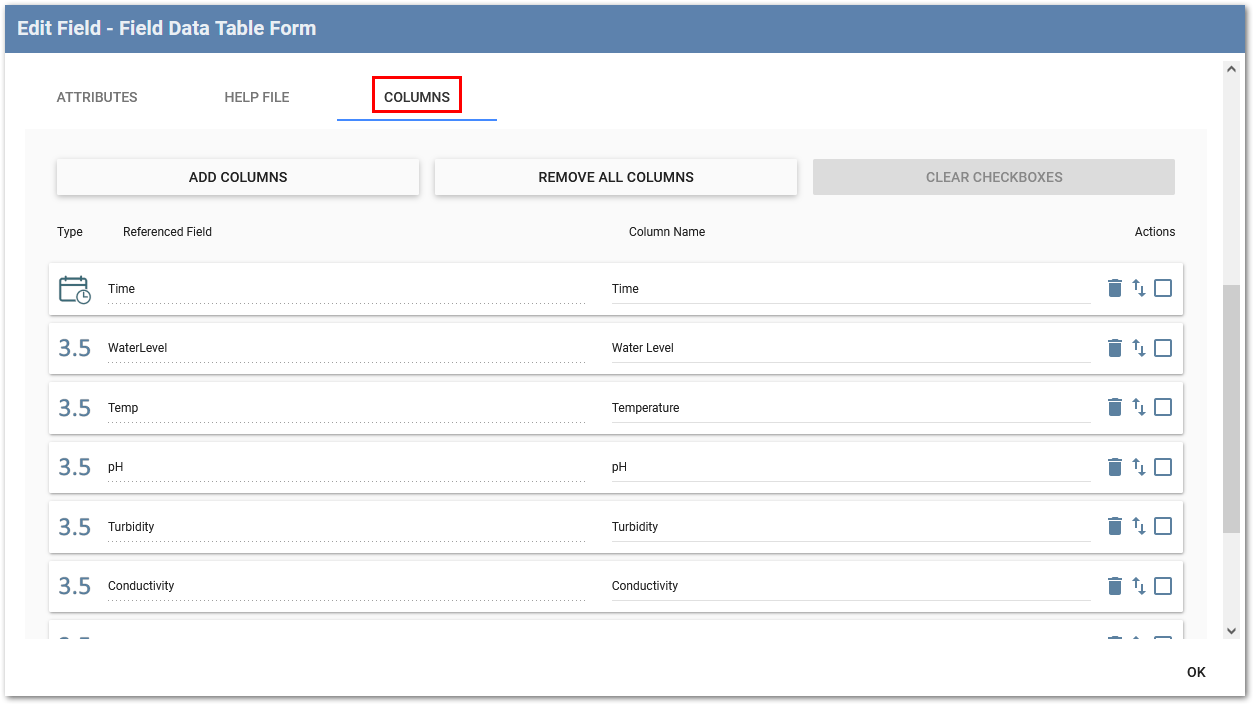
The Columns tab is used to define which fields will be the column headers in Table Form field. Columns are required and cannot be empty.
Selecting the Add Columns option will display compatible field types that are part of the associated form selected in the Form Name property. After opening the Add Columns option, a Select All check box is located next to "TYPE" and "REFERENCED FIELD" and allows for adding all compatible fields to the columns section, or columns can be added by individually selecting the desired fields check boxes. If all compatible fields have been selected, the Add Columns option will become inactive. Once the fields are selected, they will be displayed in the Columns tab, as shown below.

Column names are editable and columns can be reordered using up/down arrows, which opens a Move Selected Fields dialog, allowing the selected fields to be moved above or below the specified column. Fields can also be reordered by dragging and dropping one at a time.
A Delete icon allows selected columns to be removed from the Table Form and a Remove All Columns option allows for all columns to be removed at once. Any columns that have not been added to the Table Form, or have been added then removed, are available by selecting Add Columns. The check box option allows multiple columns to be selected and be used in conjunction with the reordering and deleting options. Selecting the Clear Checkboxes option deselects all checked columns.
Note: Additional attributes, by selecting the Attributes tab, that are available include Visible, Editable, Warning, Error, and Form Filter. An example demonstrating the use of the Form Filter is available in the General Water Sampling Template on the Community Center. |
|---|
Compatible Field Types
•String
•LongString
•Date
•Time
•DateTime
•Integer
•Decimal
•Selector
•Dynamic Selector
•Boolean
•Formula
Note: The LongString field type will display as one line of text unless line breaks are manually entered, by clicking "Enter". |
|---|